
![Setting Up Razorpay Payments in Telegram [2025 Guide]](/content/images/size/w2000/2023/11/INR.png)
Accepting online payments from customers when you, or your clients, are based in India, can be tricky. Some well-known worldwide payment providers like Stripe or PayPal might have restrictions for Indian customers or do not accept Indian cards or currency as a payment option. Fortunately, there's Razorpay.
Razorpay is the only Indian fintech company that allows users based in India to process domestic and international payments online. Thanks to Razorpay, users in India or those using Indian bank accounts, can pay online with credit and debit cards, EMI, Netbanking from 58 banks, UPI, and mobile wallets like FreeCharge, PayZap, Airtel Money, and more.
In addition to providing a paywall for online merchants and e-commerce owners, a Razorpay-Telegram integration can also allow subscription-based businesses owners to charge for their services through the best messaging app.
Building this kind of integration for accepting Razorpay payments in Telegram requires technical knowledge and skills. If you lack the time or money to build such integration, or if you just want to use the best one already available, you should check out InviteMember's Razorpay-Telegram integration.
In this article, you'll learn how to accept Razorpay payments in Telegram for granting access to private groups and channels.
Is it safe to use Razorpay in Telegram?
Razorpay, as any other renowned fintech company does, keeps security as one of its top values. With a Payment Card Industry Data Security Standard (PCI DSS) Level 1 certification, you will be safe operating online, while being compliant with the strictest regulations for electronic commerce worldwide.
Although Telegram is one of the most secure messaging apps out there, you won't need to worry about risk accepting Razorpay payments within the app. Your transactions will never be handled by Telegram at any point in the transaction process.
With the InviteMember's Razorpay-Telegram integration, your clients will never give any billing information through the app. Customers will be directed by your membership bot to a Razorpay paywall, where they will add their card details and will remain protected within Razorpay's domain.
Once the payment has been completed, your customers will be redirected back to your membership bot in Telegram.
How do I link my Razorpay account to Telegram?
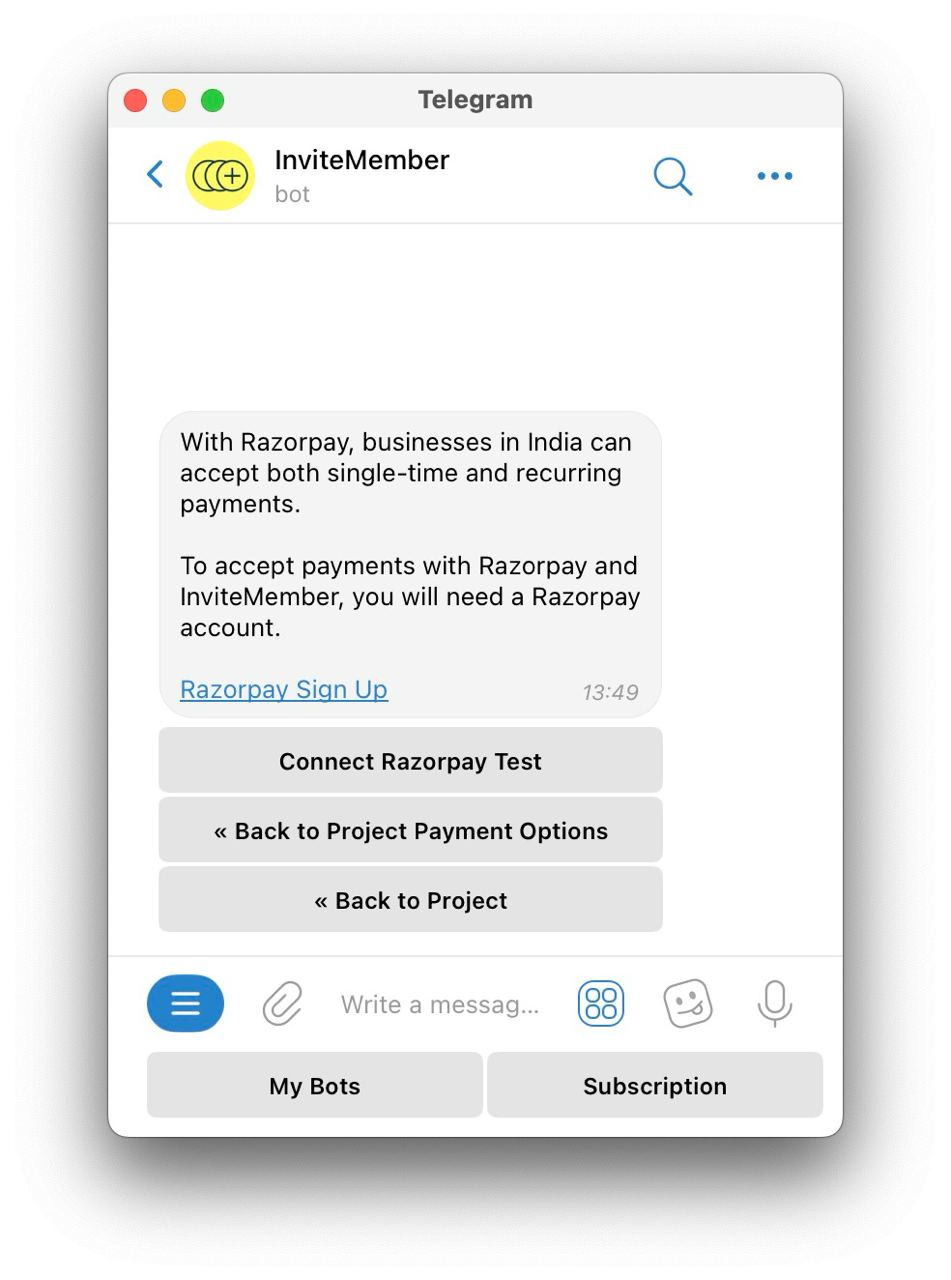
When using InviteMember's Razorpay-Telegram integration, connecting your Razorpay account to Telegram is as easy as connecting any other payment provider to the platform.
The first thing is to select the payment option you want to enable in your membership project, by following these steps:
- Create your first membership project in the InviteMember bot or open the project menu of the one you've already created.
- Hit the "Payment options" button.
- Select "Razorpay Test/Live".
- Follow the instructions prompted.
Keep in mind that the “Test Mode” connection is for testing purposes only. You won't be able to receive real payments when using this option. Once you're ready to go live, you'll need to disconnect “Test Mode” and connect “Live Mode” only.
Also, don't forget that Razorpay will work only for subscription plans with currencies set in Indian Rupees (INR). Subscription plans priced in USD, EUR, or BTC, for example, can be paid with other available payment options. Equally, plans in INR can only be paid with Razorpay.
After you've enabled Razorpay as a payment option in the InviteMember bot, you'll be asked to open a merchant account. To do this, simply go to the Razorpay website and click the "Sign Up" button. Once you've finished the registration process, you'll have access to the Razorpay Dashboard:
The InviteMember bot will also require you to generate the API keys for connecting your Razorpay account to Telegram. This is easier than it sounds. All you need to do is to go to the Razorpay dashboard, make sure Test mode is ON or OFF, depending on the mode you want to connect, and then select the API Keys tab on the Settings page:
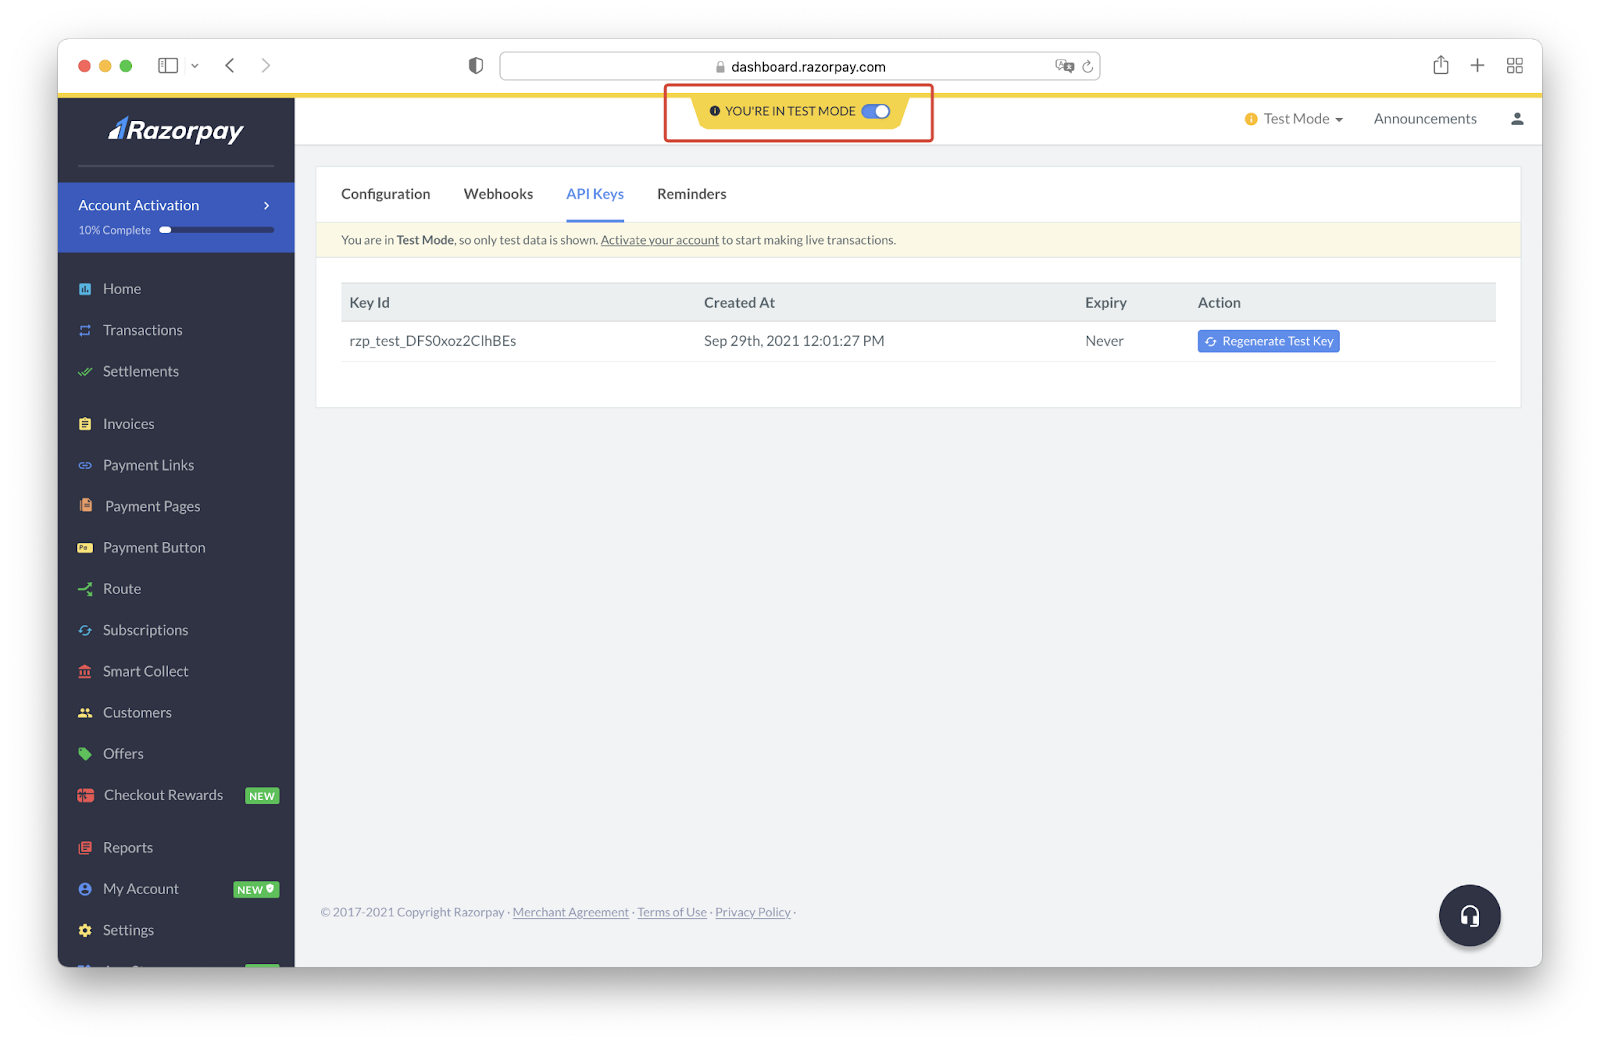
If this is your first time connecting Razorpay to another platform, you'll need to generate a new pair of keys.
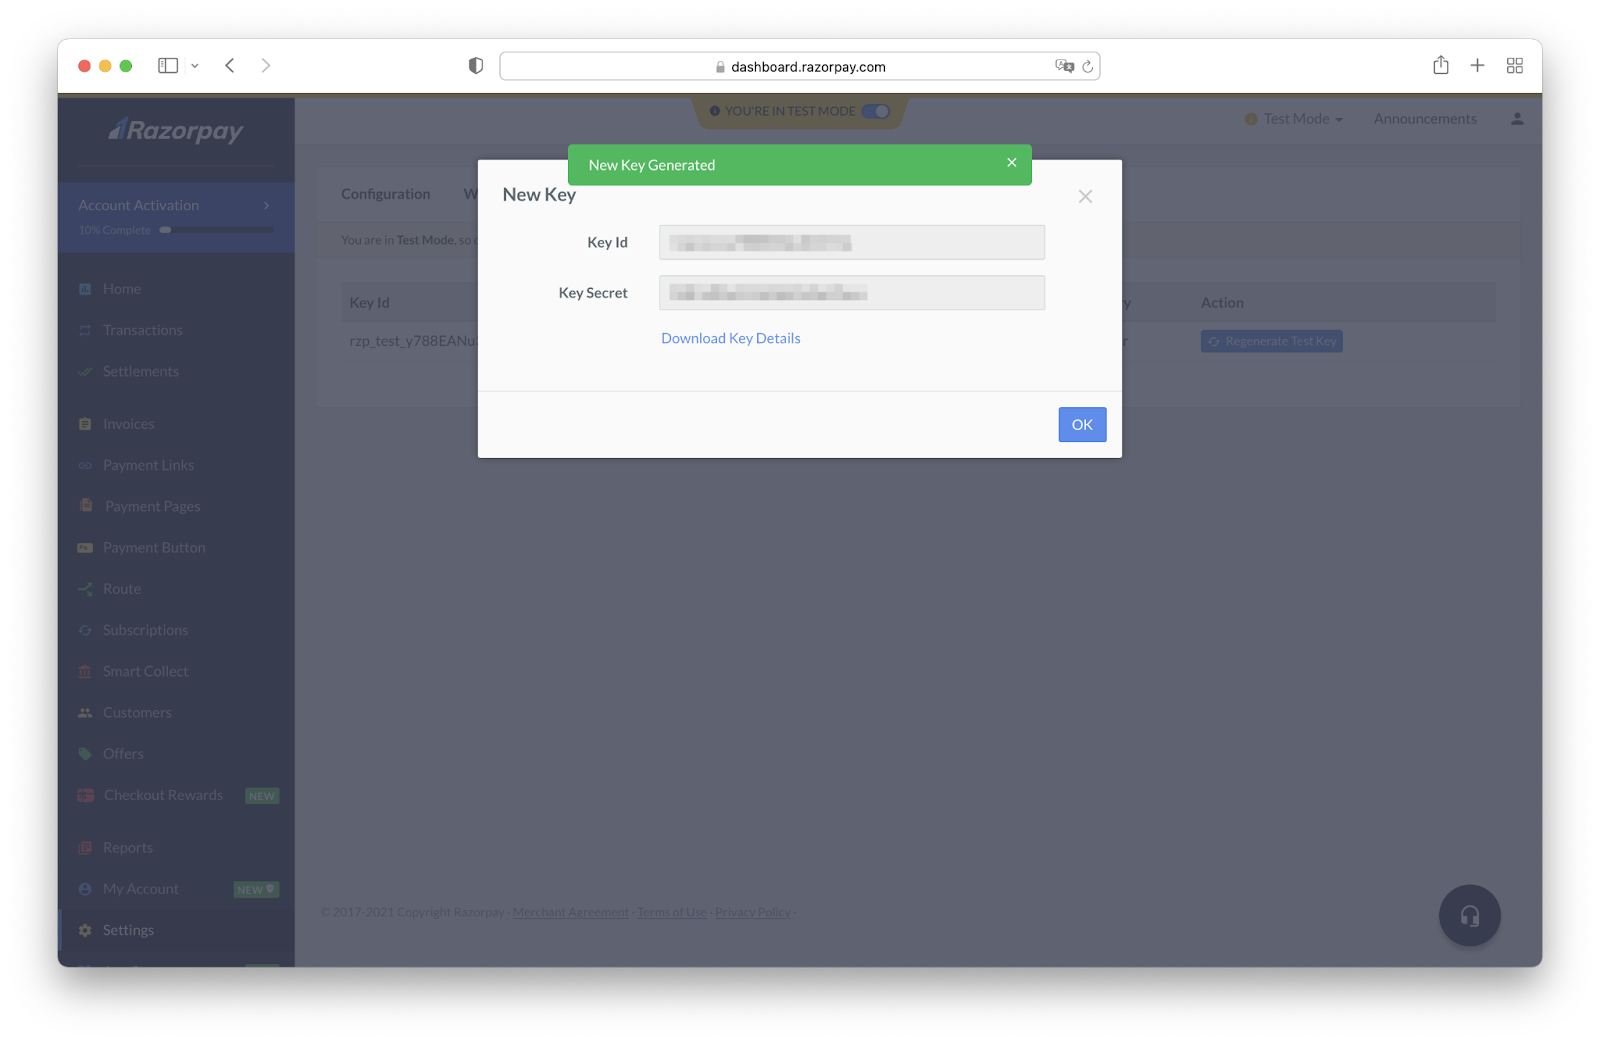
Now that you've created your API Keys, you'll have to return to the InviteMember bot and paste your Key ID there. After that you'll be asked to follow some steps in the bot, and you'll be ready to go!
How can I test my Razorpay-Telegram integration?
Before accepting real payments in your Razorpay account, you might want to make sure that everything is working as expected. That's what the Test mode is for!
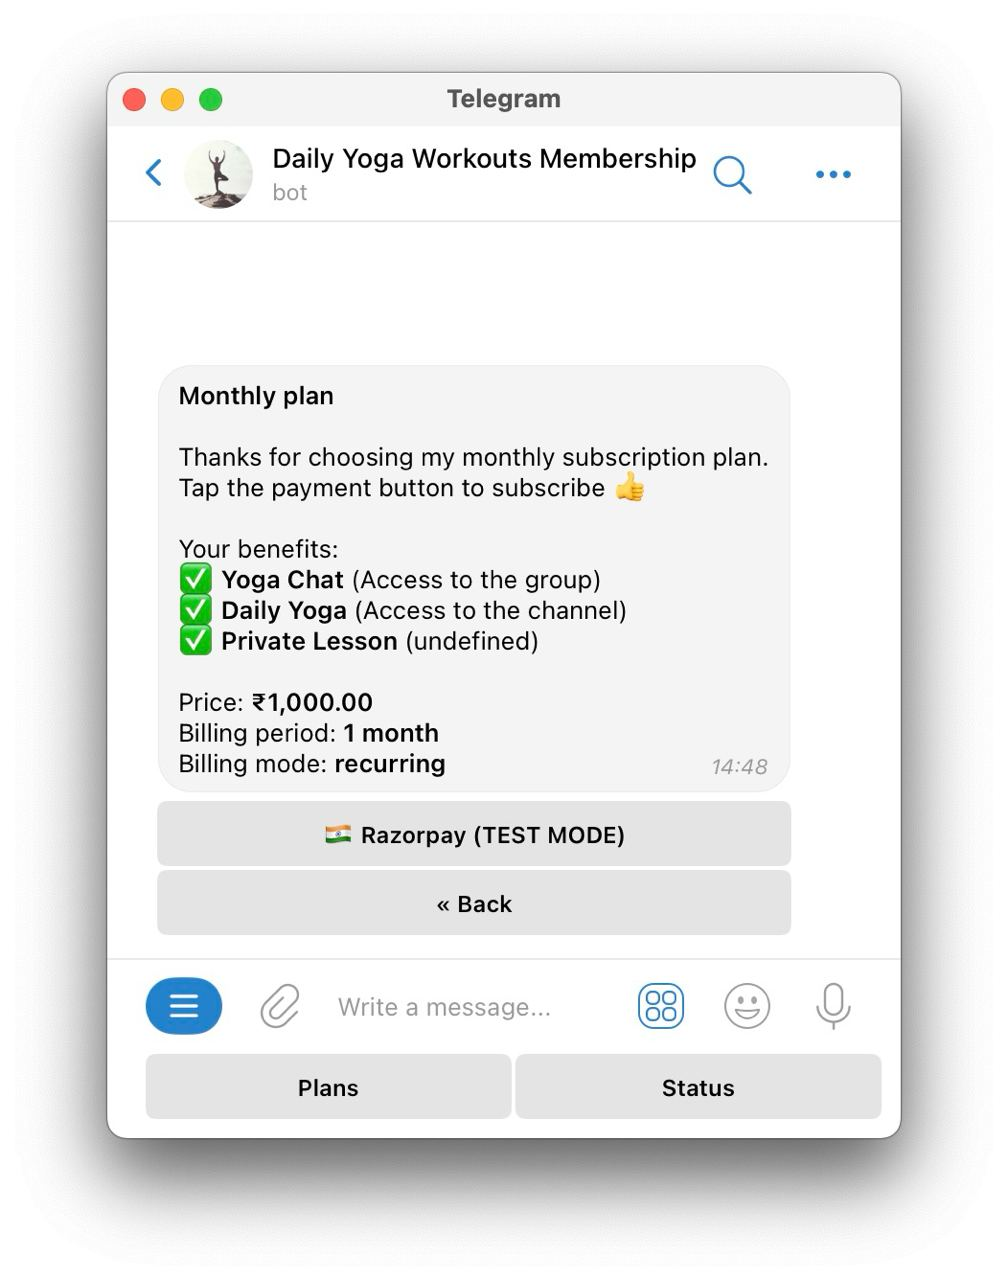
In order to test your Razorpay-Telegram integration, you just need to open the membership bot you created when you set up your InviteMember membership project, and simulate making a payment for one of your subscription plans.
After starting your membership bot, you can select a subscription plan and then select your payment option. If you connected your Razorpay account correctly, and you set your subscription plan in INR, you'll see a button for paying with Razorpay:
To know if your Razorpay-Telegram integration has been properly connected, you can use the following test card details:
Card number: 5104 0155 5555 5558
CVV & Expiration date: Any
If everything was set up correctly, your test payment will be processed and you'll have access to your members-only groups and channels!
Congratulations! Now you're ready to receive Razorpay payments in Telegram. As you can see, the process is simple, and the benefits can be huge. Currently, this is the best and only way for you to start accepting payments for your subscription service in Telegram while being based in India or for subscribers using an Indian credit card. The best thing is that you can start today for free!
